Guide
How to fix AI-generated HTML slides without regenerating them
Updated · takushio2525 · 日本語
Ask Claude or ChatGPT to “make a presentation in HTML” and you get a polished-looking deck in under a minute. It is rarely ready to use as is, though. One phrase reads wrong, a heading is too big and wraps onto a second line, a placeholder image needs to become your own photo. What is left is almost always a handful of small fixes.
This guide covers where and how to make those last fixes: the three ways to edit AI-generated slides, what each one is good at, and a step-by-step walkthrough of editing in chamfer, a free editor that runs in your browser.
Asking the AI again changes things you never asked about
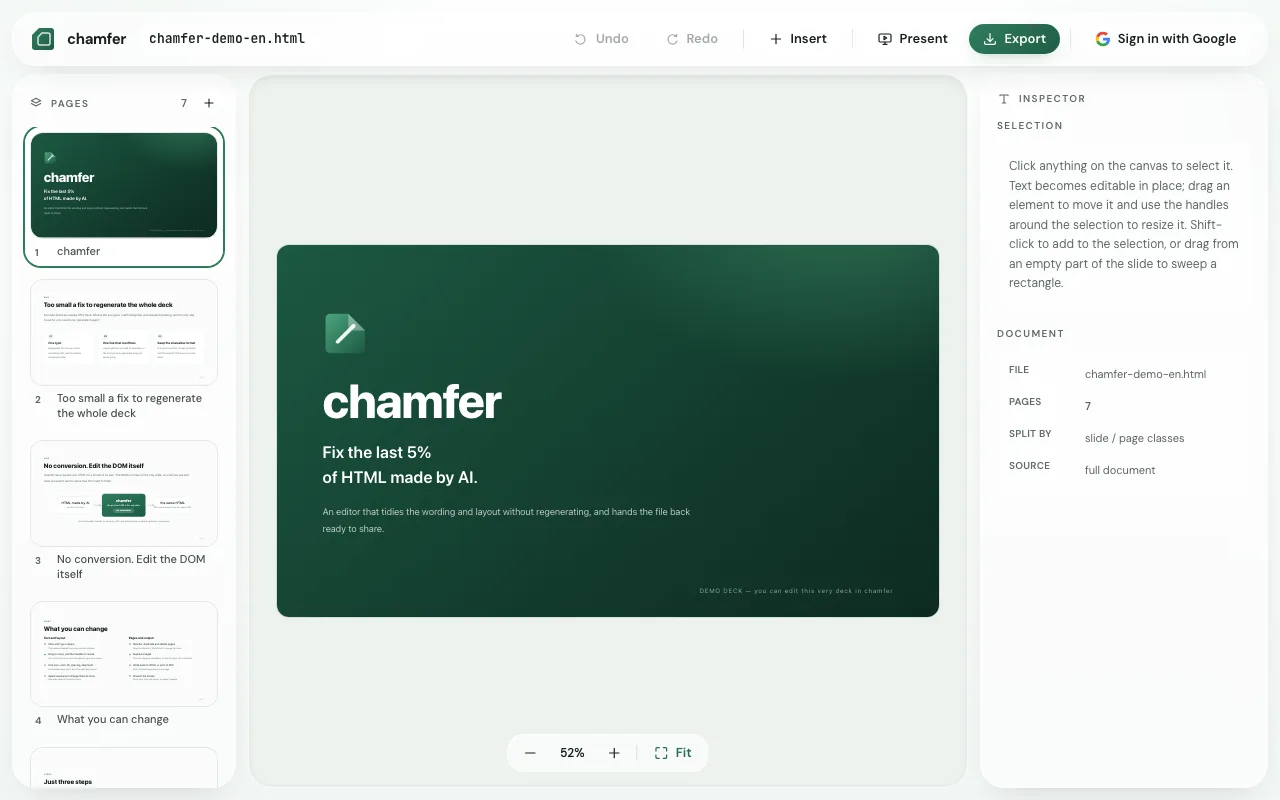
You can of course stay in the same chat and say “make the heading on slide 3 shorter”. The trouble is that the AI usually rewrites and returns the whole HTML file, and in doing so it often nudges things you were happy with: the color scheme, the wording on other slides, the position of a diagram. With long files, parts of the answer may even come back abbreviated as “the rest stays the same”.
If you only need to change one or two things, fixing those spots by hand is faster and safer than having the AI rewrite everything. Bigger changes, such as restructuring the deck or adding several slides, are the opposite: those are better left to the AI.
Three ways to edit, each good at different fixes
| Approach | Good for | Watch out for |
|---|---|---|
| Ask the AI again | Changing the structure, adding slides, rewriting a lot of text at once | It may change parts you did not mention, so you have to recheck the whole deck every time |
| Edit the HTML by hand | Changing one value when you know exactly where it is | You need to read tags and CSS. Finding the right line takes time, and deleting a closing tag breaks the layout |
| Use a visual editor | Text, position, size, colors and image swaps while you see the result | Not suited to big structural changes. Script-driven widgets are paused while you edit |
A simple rule of thumb: content and structure go to the AI, wording and layout polish are done by hand. Letting the AI build the skeleton and doing only the final touches yourself is the least likely to break anything. If you later want the AI to make another change, give it the file you edited and say “change only X in this HTML and leave everything else as is”. The HTML in the original chat does not include your edits.
Editing in chamfer, step by step
chamfer opens AI-generated HTML exactly as it is, lets you fix it, and exports the same HTML back out. Open chamfer.takushio2525.com in your browser and you are ready: nothing to install and no account needed. The HTML is never converted or re-rendered, so everything you do not touch stays exactly as it was.
1. Open the HTML file
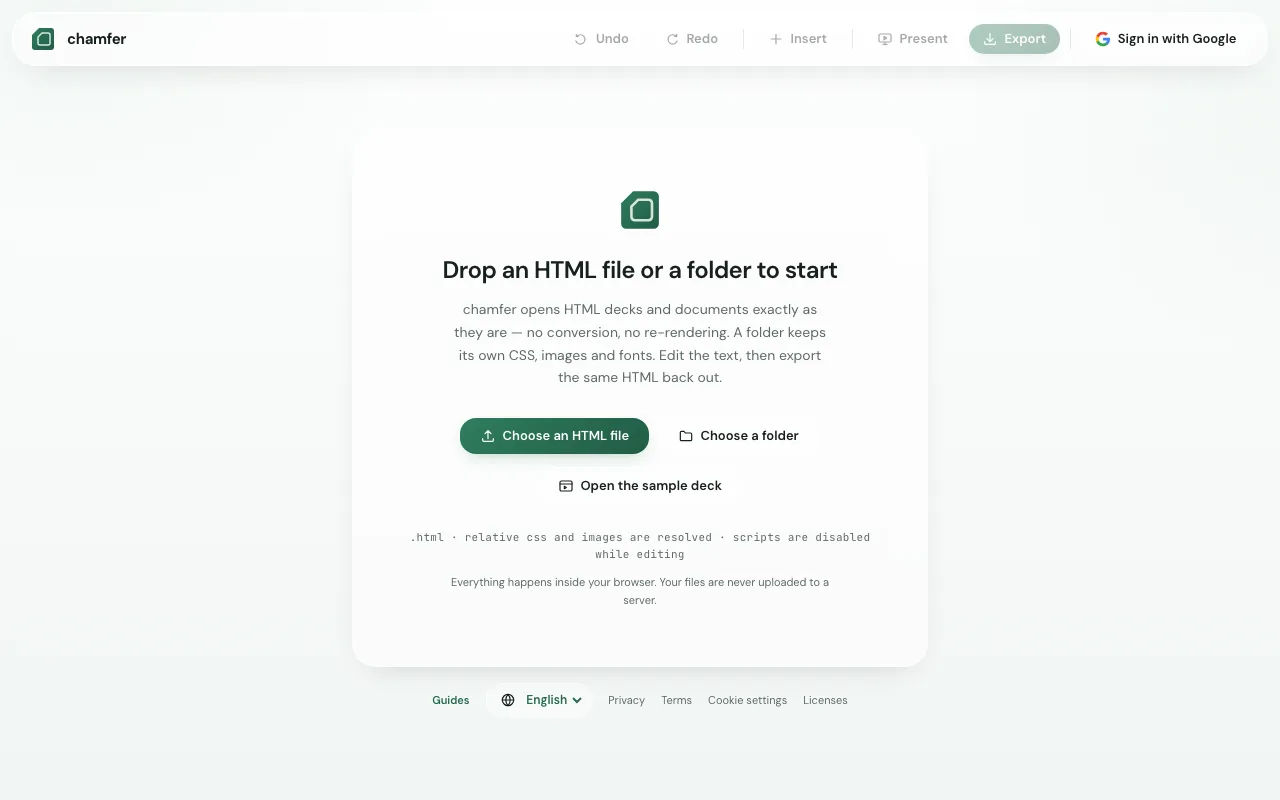
Drag the HTML file anywhere onto the page, or press Choose an HTML file. If the CSS or images are separate files, drop the whole folder or use Choose a folder (more on that below). No HTML at hand? Open the sample deck opens a seven-slide demo, the same deck you see in the screenshots in this guide.
2. Pick the slide to fix
Choose the slide you want from the thumbnails on the left. chamfer finds the slide boundaries on its own, using clues such as reveal.js section elements, a run of elements with a slide or page class, or section and article elements placed directly inside body. A document with no recognizable boundaries opens as a single page.
3. Edit text in place
Click any text on the canvas and type. Enter confirms, Shift+Enter inserts a line break, and Esc cancels. Editing on the canvas keeps inline formatting such as bold or colored words. (The Text field in the inspector on the right replaces the whole content with plain text, which drops that formatting.)
4. Move and resize
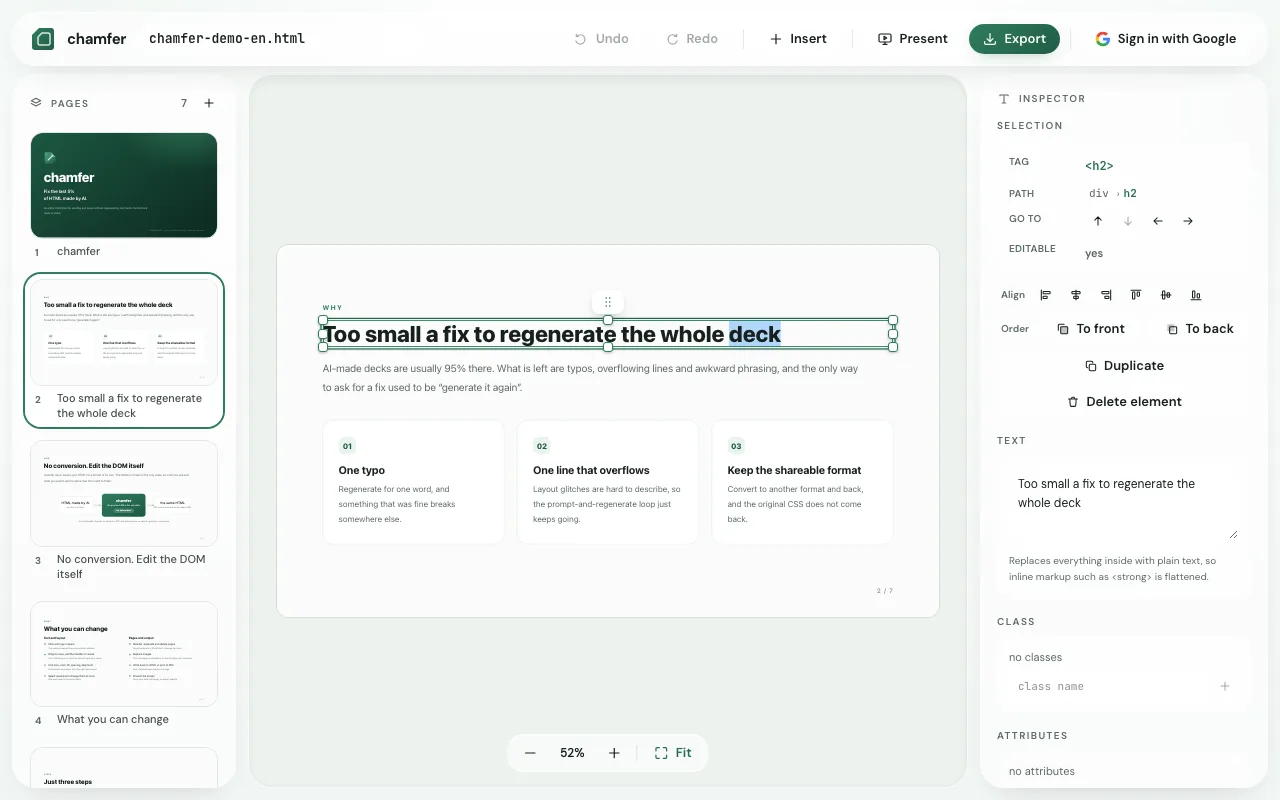
Click an element to get a green frame with handles. Drag the element itself to reposition it (it snaps to the slide’s center and edges and to other elements’ edges, showing a guide line; hold Alt to move freely), or drag the corner and edge handles to resize it (clicking text starts editing it; dragging it moves it). With an element selected, the arrow keys nudge it by 1px, or by 10px with Shift held, and Delete removes it. ⌘+D duplicates it, and ⌘+C / ⌘+V copy and paste it, onto another slide too. The Align buttons in the inspector line up the edges or centers of the selected elements and space three or more evenly (a single element aligns to the slide). Moves are expressed with CSS transform, so neighboring elements are never pushed around.
5. Change font size, colors and images
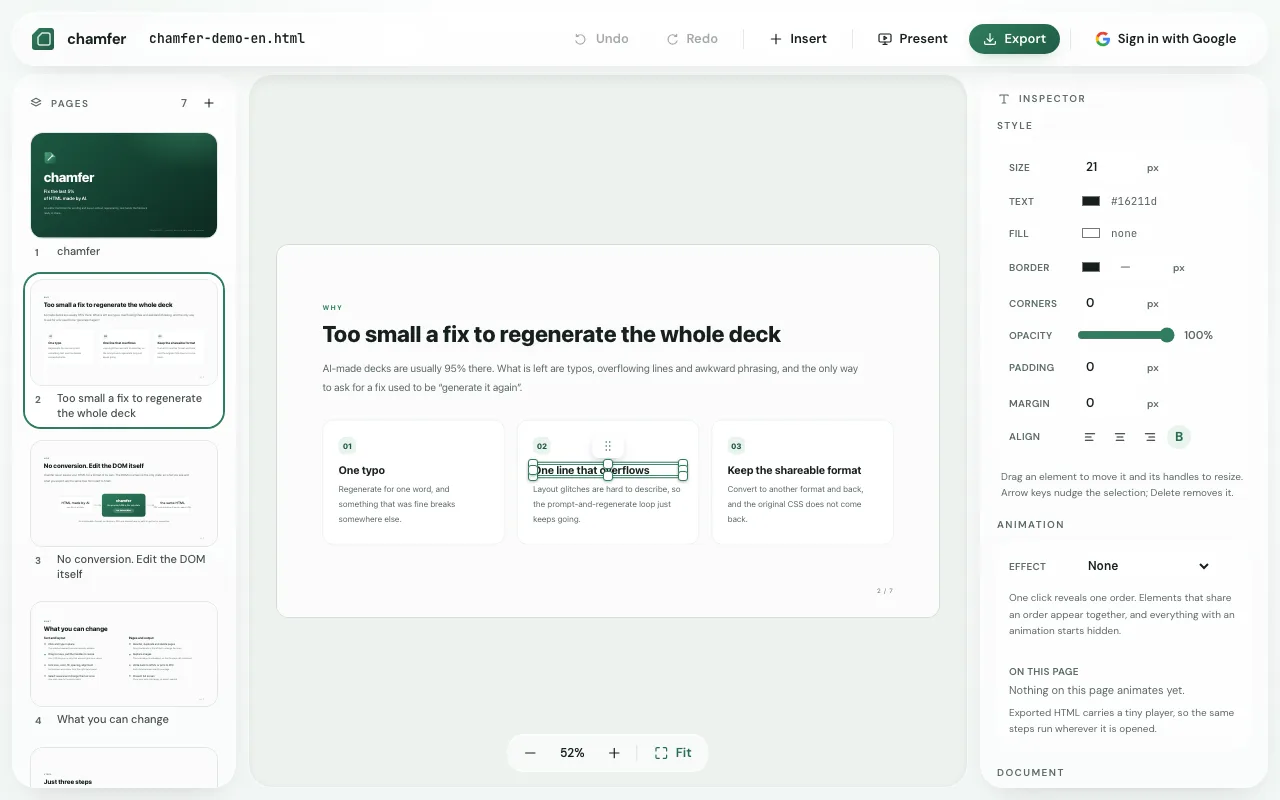
With an element selected, the Style section of the inspector lets you set the size, text color, fill, border (color and width), corner radius, opacity, padding, margin, alignment (left, center, right) and bold (on shapes without text, the text color row becomes the line color). Each change is written to that element’s style attribute. Your CSS files and <style> blocks are left alone, so the same heading on other slides does not change along with it.
Select an image and a Replace… button appears; pick a picture from your computer. To add a new image, choose Image… from Insert, paste it, or drop it onto the editor. Images are embedded in the HTML as data URIs, so the exported file stays self-contained; photos longer than 1920px on a side are scaled down first.
6. Edit several elements at once, and undo
Shift-click adds elements to the selection. Dragging from an empty area of the slide selects every element that sits completely inside the rectangle. Moves and changes such as text color then apply to all of them at once.
Undo (⌘+Z, or Ctrl+Z on Windows) steps back one action at a time, and Redo is ⇧+⌘+Z (Ctrl+Y on Windows). A drag is recorded as a single step when you release the mouse.
7. Reorder slides and add elements
Drag the thumbnails on the left to change the slide order. Hover over a thumbnail to reveal buttons that duplicate or delete that slide. The + above the list duplicates the current slide and places the copy right after it. There is no blank-slide command, so duplicate a similar slide and edit its content.
Insert in the toolbar adds a text box or a shape (rectangle, rounded rectangle, ellipse, triangle, diamond, star, speech bubble, block arrow, line or arrow) to the middle of the current slide; its line color, fill and line width are set in the inspector. New elements float above everything else, so the existing content does not move by a single pixel.
8. Export
Press Export in the toolbar and choose a format based on what you will do with the file next.
- As a page: the HTML you imported with only your edits on top, saved as
original-name.chamfer.html. It is a drop-in replacement for the original file. - As a presentation: the same HTML with a start screen and arrow-key navigation built in (
original-name.chamfer-deck.html). Anyone can present it by opening it in a browser. - As a PDF: prints one slide per page, saved through your browser’s print dialog (see how to turn HTML slides into a PDF).

When you export as a page, the only differences are the parts you changed: the style and attributes of elements you touched, and any elements or slides you added or removed. Export without touching anything and you get back HTML with the same content as the original. The markers chamfer adds while you edit are stripped on export; only the animation settings you added are kept, so they still play in the exported file.
When the CSS and images are separate files
Sometimes the AI hands you several files, such as index.html, style.css and a folder of images. Open only the HTML and parts of the design will be missing. chamfer tells you when the HTML refers to CSS or JavaScript files that were not loaded with it; when you see that notice, open the whole folder instead.
Opening a folder does not rewrite any relative paths in the HTML. The folder contents are copied into your browser’s own storage (IndexedDB) and are never sent to a server. If the folder holds several HTML files, you can pick which one to open. Only the edited HTML file is exported, so put it back in the original folder in place of the old one and its CSS and image references keep working.
What pauses while you edit, and what chamfer can’t do
- Scripts in the HTML (
<script>tags,onclickattributes and the like) are paused while you edit, so an unfamiliar file cannot run anything on its own. They are restored on export. As a result, script-driven widgets such as clickable tabs do not respond while you are editing. - There is no font family field, no way to change the stacking order of elements, and no blank-slide command.
- If you are not signed in, reloading the page clears the open document. Export your work before you close the tab.
- On narrow screens the page list and the inspector collapse. chamfer is designed for a desktop browser.
- It cannot export to PowerPoint (.pptx) or Google Slides.
Frequently asked questions
- Q. Is chamfer free?
- Yes, and there is no sign-up. Signing in with a Google account is optional; it only adds keeping the document you are editing in the cloud and sharing it through a view-only link.
- Q. Are the files I open uploaded anywhere?
- Not unless you sign in. Without signing in, everything happens inside your browser and the files you open are never sent to a server. While you are signed in, your document is saved automatically to your own cloud space whenever you pause editing (just opening a file does not upload it).
- Q. Does it work with HTML that wasn’t made by Claude or ChatGPT?
- Yes. It does not matter what produced the file. You can open a single HTML file or a folder with separate CSS and images, including reveal.js decks and decks in the deck-stage format exported by Claude Design.
- Q. Can it convert slides to PowerPoint or Google Slides?
- No. chamfer exports three things: the edited HTML, a self-contained HTML presentation, and a PDF with one slide per page.
- Q. Can I use it on a phone?
- It opens, but on narrow screens the page list and the inspector collapse, which makes detailed edits awkward. chamfer is designed for a desktop browser.